Building a PC may seem intimidating if you’ve never done it before, but it can be a rewarding and enjoyable process. Here’s a general step-by-step guide to help you build your own PC: Reference Parts Required to Build A PC
1. Plan and research: Determine your budget, intended use of the PC, and the components you’ll need. Research compatible parts and read reviews to make informed decisions.
2. Prepare your workspace: Find a clean, well-lit area with a large enough workspace to assemble your PC. Ensure you have all the necessary tools nearby, such as a screwdriver, zip ties, and thermal paste.
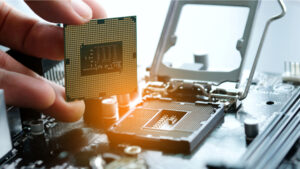
3. Install the CPU: Open the CPU socket on the motherboard, gently place the CPU into the socket, and secure it. Follow the instructions provided by the manufacturer to ensure proper alignment and installation.
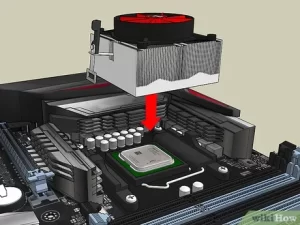
4. Install the CPU cooler: Apply a thin layer of thermal paste on the CPU, then attach the CPU cooler according to the instructions provided with the cooler. This may involve attaching a heatsink, fan, or liquid cooling system.
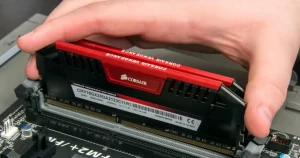
5. Install the RAM: Locate the RAM slots on the motherboard and gently insert the RAM sticks into the slots. Ensure they are seated properly by applying gentle pressure until the clips on the sides lock into place.
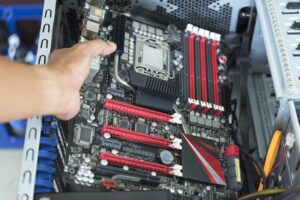
6. Install the motherboard: Place the motherboard into the PC case and align it with the pre-installed standoffs. Screw the motherboard into place using the provided screws, ensuring it’s securely fastened.
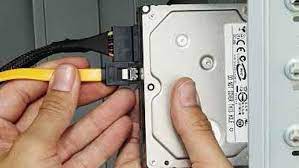
7. Connect storage devices: Install your chosen storage devices (SSD or HDD) into the appropriate slots in the case. Connect the SATA data cables to the storage devices and the motherboard, and connect the SATA power cables from the power supply to the devices.
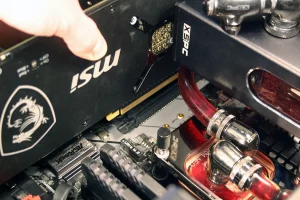
8. Install the graphics card: If you have a dedicated graphics card, locate the PCIe slot on the motherboard and insert the card into the slot. Secure it using the screw provided and connect any necessary power cables from the power supply to the graphics card.
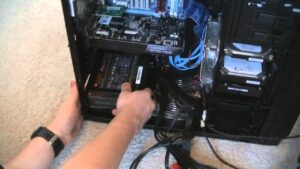
9. Connect the power supply: Mount the power supply into the case, ensuring it is securely fastened. Connect the necessary cables from the power supply to the motherboard, CPU, graphics card, storage devices, and any other components that require power.
10. Cable management: Organize and route the cables neatly to improve airflow and aesthetics. Use zip ties or cable management solutions to secure and manage the cables.
11. Connect peripherals: Connect your monitor, keyboard, mouse, and any other peripherals to the appropriate ports on the motherboard or graphics card.
12. Double-check connections: Before closing the case, double-check that all connections are secure and cables are properly connected.
13. Close the case: Carefully close the PC case, ensuring all screws are tightened and the case is secure.
14. Power on and install the OS: Connect the power cord to the power supply and turn on the PC. Install your chosen operating system using a bootable USB drive or DVD. Follow the installation instructions and configure your system.
15. Install drivers and updates: After the OS installation, install the necessary drivers for your components from the manufacturer’s website. Update the operating system and drivers to ensure optimal performance and security.
With these steps, you should be able to successfully build your own PC. Remember to consult the manuals and instructions provided with your components for specific details and follow safety precautions to avoid static discharge or damage to your components.